Visual Testing for Vitest - Drop-in Replacement Powered by Vizzly
Drop-in replacement for Vitest 4 visual testing with local TDD mode, Honeydiff, and team review. Add the plugin and get local visual feedback, cloud builds, and position-based comments.
The Vitest team just shipped visual testing in Vitest 4, and
it’s exactly what the community needed. Native screenshot testing, right in your test runner, with
zero extra dependencies. If you’re using Vitest browser mode, you can add await expect(page).toMatchScreenshot() to your tests right now and it just works.
But here’s the thing - basic screenshot comparison gets you started, but what happens when you need more? What about local TDD workflows where you can see visual changes instantly as you code? Team collaboration features like position-based comments and review workflows? A visual regression testing engine built specifically for UI testing that can handle dynamic content?
That’s exactly why we built @vizzly-testing/vitest - a drop-in replacement that enhances Vitest’s
visual testing with advanced features while keeping the same API you already know.
True Drop-in Replacement for Vitest Browser Mode
Here’s what I mean by “drop-in replacement”: you’re already using Vitest’s standard
toMatchScreenshot API for browser testing. You don’t change a single line of test code. Just add
our plugin to your vitest.config.js and keep using the exact same API you’re using today.
// vitest.config.js
import { defineConfig } from 'vitest/config'
import { vizzlyPlugin } from '@vizzly-testing/vitest'
import { playwright } from '@vitest/browser-playwright'

export default defineConfig({
  plugins: [vizzlyPlugin()],
  test: {
    browser: {
      enabled: true,
      instances: [
        {
          browser: 'chromium',
          provider: playwright()
        }
      ]
    }
  }
})
That’s it. Your existing tests keep working. The plugin transparently replaces Vitest’s screenshot system with Vizzly’s visual development workflow platform. Same API, better features.
Local TDD Mode That Actually Feels Good
When you’re building UI, you need instant visual feedback. Not “run tests, check a static report” feedback. Real-time “I changed CSS, what broke?” feedback.
Fire up vizzly tdd and you get a live dashboard at http://localhost:47392/dashboard. As you run
your Vitest tests, visual diffs appear instantly. We’re talking milliseconds here - Honeydiff
processes comparisons at 231.8 million pixels per second, which means your 18-million-pixel
screenshot gets compared in under 100 milliseconds.
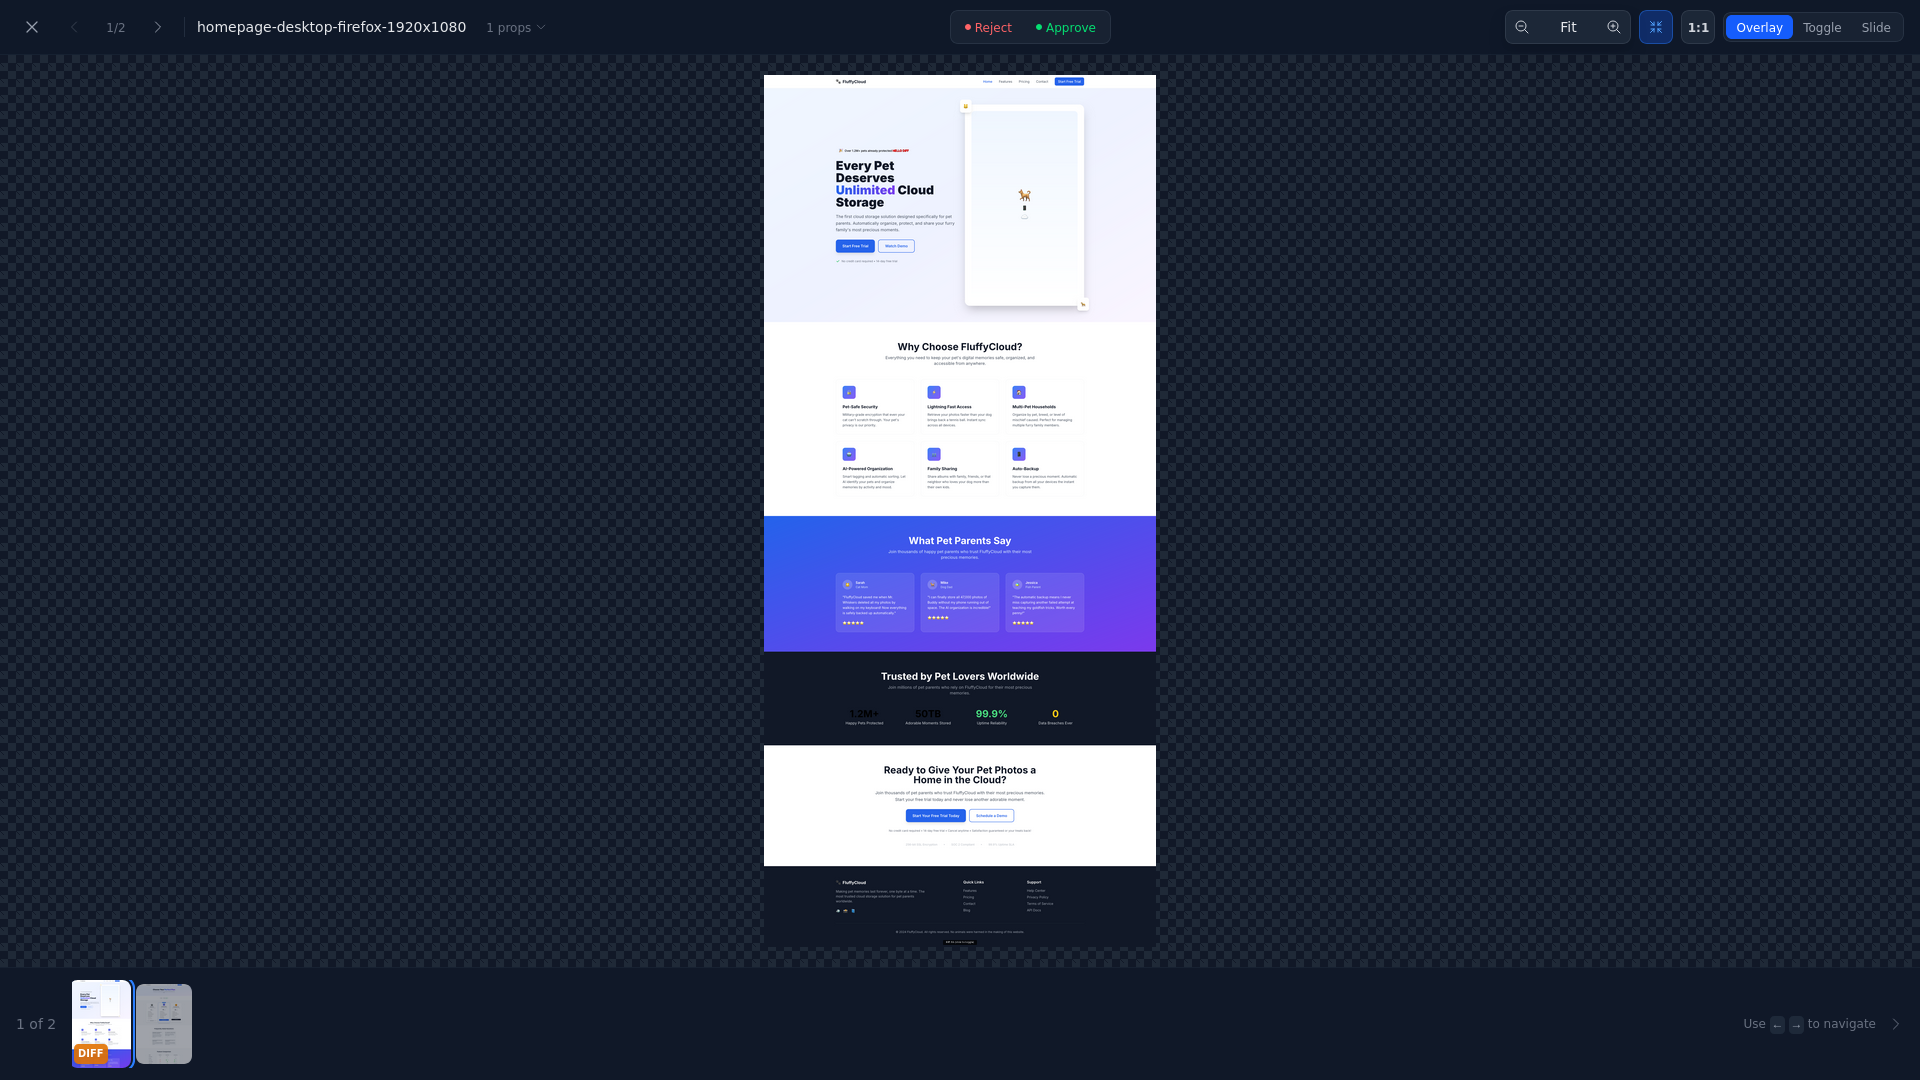
The dashboard shows you exactly what changed, where it changed, and whether you care. Overlay mode, side-by-side, onion skin - whatever helps you see the diff. Accept the change with one click, or keep coding knowing you’ve got a real visual regression to fix.

This is what visual testing in development workflows should feel like. Not a separate testing phase, not a CI-only tool. Just integrated visual quality as you code.
And here’s the best part: local TDD mode works without even signing up for Vizzly. Just install the
CLI and run vizzly tdd. No account required, no credit card, no nothing. Perfect for trying it out
or working on side projects.
Team Collaboration Built In
Here’s where it gets interesting. When your CI runs, vizzly run "npx vitest" automatically creates
team builds. Every commit. Every PR. Automatic.
Your team gets position-based comments, mentions, notifications, review decisions, and deep links to specific visual changes. Designers can click directly on a screenshot to comment on a button. PMs can see what changed without digging through raw image files.
It’s the same workflow from local TDD to team review. Local iteration with vizzly tdd, team
collaboration through automatic CI builds.
The Honeydiff Engine: Purpose-Built for Visual Regression Testing
Vitest’s native visual testing uses pixelmatch for image comparison. It’s a solid library - fast, accurate, widely used. But we built Honeydiff specifically for visual regression testing workflows, and the difference matters.
Dynamic Content Detection - Honeydiff uses spatial clustering to identify where changes happen, not just that they happened. This makes diff overlays way more useful because you can see distinct regions of change with exact locations, not just a sea of red pixels.
Live Data Testing - SSIM (Structural Similarity Index) scoring means you can test with real data instead of static fixtures. Content might change, but if the SSIM score stays high, you know the UI structure is intact. This is huge for testing real applications with dynamic content.
Smart Anti-Aliasing - Conservative AA detection that catches real visual changes while filtering font rendering artifacts. In our benchmarks, it reduces false positives by 4x with only 10% performance overhead.
Rich Metrics - Intensity statistics, bounding boxes, cluster analysis. You get the data you need to build sophisticated visual testing workflows, not just simple pass/fail results.
I wrote about why we built Honeydiff if you want the deep dive on the technical approach. The short version: visual testing needed a diff engine built specifically for UI workflows, not generic image comparison.
Multi-Variant Testing Without the Complexity
Here’s a pattern that’s surprisingly common: you need to test the same component across different themes, viewports, or user states. Most visual testing tools make you write separate tests for each variant or get clever with test structure.
Vizzly handles this with the properties object:
// Same screenshot name, different variants
await expect(page).toMatchScreenshot('button.png', {
  properties: { theme: 'dark', viewport: '1920x1080' }
})

await expect(page).toMatchScreenshot('button.png', {
  properties: { theme: 'light', viewport: '1920x1080' }
})
Each property combination gets its own baseline, automatically. No test file duplication, no complex naming schemes. Just clean test code and automatic variant management.
Works the Way You Already Work
The beauty of this SDK is that it fits right into your existing workflow. You’re already using
Vitest. You’re already writing tests with toMatchScreenshot. You’re already running them locally
and in CI.
Nothing changes except what happens under the hood. Better diffs, local TDD workflows, team collaboration, multi-variant testing - all without changing your test code or learning new APIs.
Install the plugin:
npm install -D @vizzly-testing/vitest @vizzly-testing/cliAdd it to your config (literally two lines).
Keep using the Vitest API you already know.
Run vizzly tdd when you want instant local feedback. Run vizzly run "npx vitest" in CI when you
want team builds. Or just run npx vitest and screenshots get captured for later review.
The Git-Based Approach Doesn’t Scale
Vitest’s native visual testing follows the same pattern I wrote about back in May 2024 - checking screenshots directly into your git repository. For small projects, this works. You get visual diffs in GitHub PR reviews, it’s free, and there’s zero external dependencies.
But here’s the real problem: screenshots are easily 1MB each. Start testing across multiple viewports, browsers, and user states, and your repo balloons fast. A hundred screenshots? That’s 100MB. A thousand? You’re at 1GB just for screenshots.
This isn’t just about disk space. Cloning your repo becomes slow. Git operations get sluggish. Your CI pulls down megabytes of image data every single run. And if you’re testing with any frequency, your git history fills with screenshot commits that make actual code changes harder to find.
I’ve seen this firsthand. Projects that start with git-based visual testing eventually hit a wall. The repo gets unwieldy, developers start complaining about clone times, and someone suggests Git LFS. Then you’re managing LFS storage, dealing with quota limits, and paying for bandwidth.
What About Vitest’s Native Testing?
Look, Vitest’s native visual testing is great for what it is. If you need basic screenshot comparison and you’re happy with the built-in features, use it. It’s right there, zero setup, part of your test runner.
But if you want local TDD workflows, team collaboration, sophisticated diff analysis, or multi-variant testing without complexity - that’s what we built this for. Same API, more capabilities, integrated into a visual development workflow platform. And critically, no bloated git repos.
We’re not competing with Vitest’s feature. We’re building on top of it. Taking the API that Vitest shipped and connecting it to a whole workflow platform designed for visual quality at scale.
Starting Fresh? Use the Vizzly API Directly
Here’s something worth knowing: if you’re not already invested in Vitest’s visual testing API, I’d
actually recommend using Vizzly’s native vizzlyScreenshot function instead of the
toMatchScreenshot matcher.
Why? The Vitest plugin is brilliant for compatibility - it lets you keep your existing tests unchanged. But if you’re starting from scratch, the native Vizzly API is cleaner and more explicit:
import { vizzlyScreenshot } from '@vizzly-testing/cli/browser'
import { expect, test } from 'vitest'
import { page } from 'vitest/browser'

test('homepage matches screenshot', async () => {
  await page.goto('/')

  // Direct Vizzly API - clean and explicit
  await vizzlyScreenshot(page, 'homepage.png', {
    properties: { viewport: '1920x1080' }
  })
})
No matchers, no expect wrappers, no magic. Just a straightforward function call that captures a screenshot and sends it to Vizzly. It’s the same API we use across all our SDKs - Playwright, Cypress, Storybook, static sites - so you already know it if you’ve used Vizzly before.
The matcher approach (toMatchScreenshot) is fantastic when you need drop-in compatibility. But if
you’re building something new, the native API is my preference. Simpler, more portable, and you’re
not tied to Vitest’s browser testing conventions.
Try It Out
The SDK just shipped (version 0.0.2, fresh off the presses). It works with Vitest 4.0+ and requires Node.js 22+ for Honeydiff compatibility.
npm install -D @vizzly-testing/vitest @vizzly-testing/cliAdd the plugin to your vitest.config.js, keep using toMatchScreenshot exactly like you do today,
and experience visual testing integrated into your development workflow. Or use the native
vizzlyScreenshot API if you prefer a more direct approach.
Want instant visual feedback while coding? That’s vizzly tdd. Want automatic team builds from CI?
That’s vizzly run "npx vitest". Want both? You got it.
Check out the docs or sign up for Vizzly to see it in action. The world needs better visual quality tooling, and we’re building it.
The Vitest SDK is part of Vizzly’s visual development workflow platform. Learn more about local TDD mode, team collaboration features, and the Honeydiff engine.