What If You Could Visually Test a CLI?
We build visual testing tools for UIs. When our CLI started getting fancy with colors and formatting, I wondered: can we visually test our own CLI? Turns out, yes. Here's how I did it.
Here’s a fun problem: We build visual testing tools for UIs. Our CLI is getting more sophisticated with colors, formatting, and layout. Can we visually test the thing that runs our visual tests?
The answer is yes. And honestly, I was surprised at how well it worked.
The Problem: CLIs Have Visuals Too
When I started building out the Vizzly CLI, it was simple. Plain text output, maybe some colors for success and error states. Standard stuff. But as the CLI grew, so did its visual complexity.
We started building out a proper design system with brand colors, semantic meanings, text hierarchy, and consistent formatting. The beginnings of something more fun and complex. The help output got a custom formatter with grouped commands, quick start examples, and dynamic context showing your current state. Error messages got styled consistently. Progress spinners got smooth animations.
// From our colors.js - a full design system for the terminal
export let brand = {
  amber: '#F59E0B',      // Primary brand, actions, highlights
  success: '#10B981',    // Approved, passed, active
  warning: '#F59E0B',    // Pending, attention
  danger: '#EF4444',     // Rejected, failed, errors
  info: '#3B82F6',       // Processing, informational

  // Text hierarchy
  textPrimary: '#FFFFFF',
  textSecondary: '#9CA3AF',
  textTertiary: '#6B7280',
  textMuted: '#4B5563',
};
We basically built a TUI design system. And here’s the thing about design systems: they can regress. Colors can get out of sync, layouts can break, formatting can get inconsistent.
If this were a web UI, I’d obviously visually test it. But it’s a CLI. What do you do?
The Idea: Playwright, But for Terminals
The solution hit me when I thought about what Playwright does for web apps. It launches a browser, interacts with it programmatically, and takes screenshots. The browser renders HTML and CSS into pixels. Then you compare those pixels.
A terminal is basically the same thing. It takes text with ANSI escape codes (colors, formatting) and renders it into a visual display. The only difference is the rendering engine: xterm instead of Chromium. What if we could launch a terminal, run commands, and take screenshots? Like Playwright, but for CLIs.
I wasn’t sure if this would actually work well, but I threw together a proof of concept over a weekend. The idea was simple: use Xvfb (a virtual X server) to run a headless xterm, send keystrokes with xdotool, and capture screenshots. If it worked, great. If not, at least I’d learn something.
It worked way better than I expected. So I kept going and built tui-driver.
How It Works
The API ended up feeling pretty natural if you’ve used Playwright or Puppeteer:
import { Terminal } from 'tui-driver'

let term = await Terminal.launch({ cols: 100, rows: 35 })

await term.type('vizzly --help')
await term.press('Enter')
await term.waitForStable()
await term.screenshot({ name: 'vizzly-help' })

await term.close()
Launch a terminal, type commands, wait for output to settle, take a screenshot. Under the hood, there are two drivers that handle the actual terminal rendering. I set up a spec so I could add more in the future (native macOS Terminal.app or Windows Terminal would be fun).
The PTY driver (pure JavaScript) uses node-pty to spawn a real shell process, @xterm/headless to parse the terminal output into a virtual buffer, and canvas to render that buffer into a PNG. This works everywhere: Linux, macOS, Windows. It’s great for local development and cross-platform CI.
The x11 driver (Linux) uses Xvfb to run a real xterm window headlessly. It types using xdotool and captures screenshots with xwd. This is perfect for CI environments where you want pixel-perfect rendering that matches real terminal emulators. The x11 approach gives you actual font rendering with proper anti-aliasing, exactly like a user would see.
Both drivers produce PNG screenshots. And what do we do with PNG screenshots? Visual testing.
Testing Our Own CLI
Here’s what our actual CLI visual tests look like:
import { Terminal } from 'tui-driver'
import { vizzlyScreenshot } from '../../src/client/index.js'

describe('vizzly CLI visual tests', () => {
  test('vizzly --help', async t => {
    let term = await Terminal.launch({
      driver: 'x11',
      cols: 100,
      rows: 150
    })

    await term.type('node bin/vizzly.js --help')
    await term.press('Enter')
    await term.waitForStable({ timeout: 10000 })

    let screenshot = await term.screenshot()
    await vizzlyScreenshot('vizzly-help', screenshot)

    await term.close()
  })
})
We test the main help output, subcommand help screens, the doctor diagnostics command, and even error states like invalid commands. Each one produces a screenshot that goes through Vizzly’s visual comparison.
The help output alone is 55+ lines of carefully formatted text with the branded header featuring our grizzly bear mascot ʕ□ᴥ□ʔ, grouped commands by category (Core, Setup, Account, Projects, Plugins), color-coded options and descriptions, quick start examples, dynamic context showing your current state, and footer links.
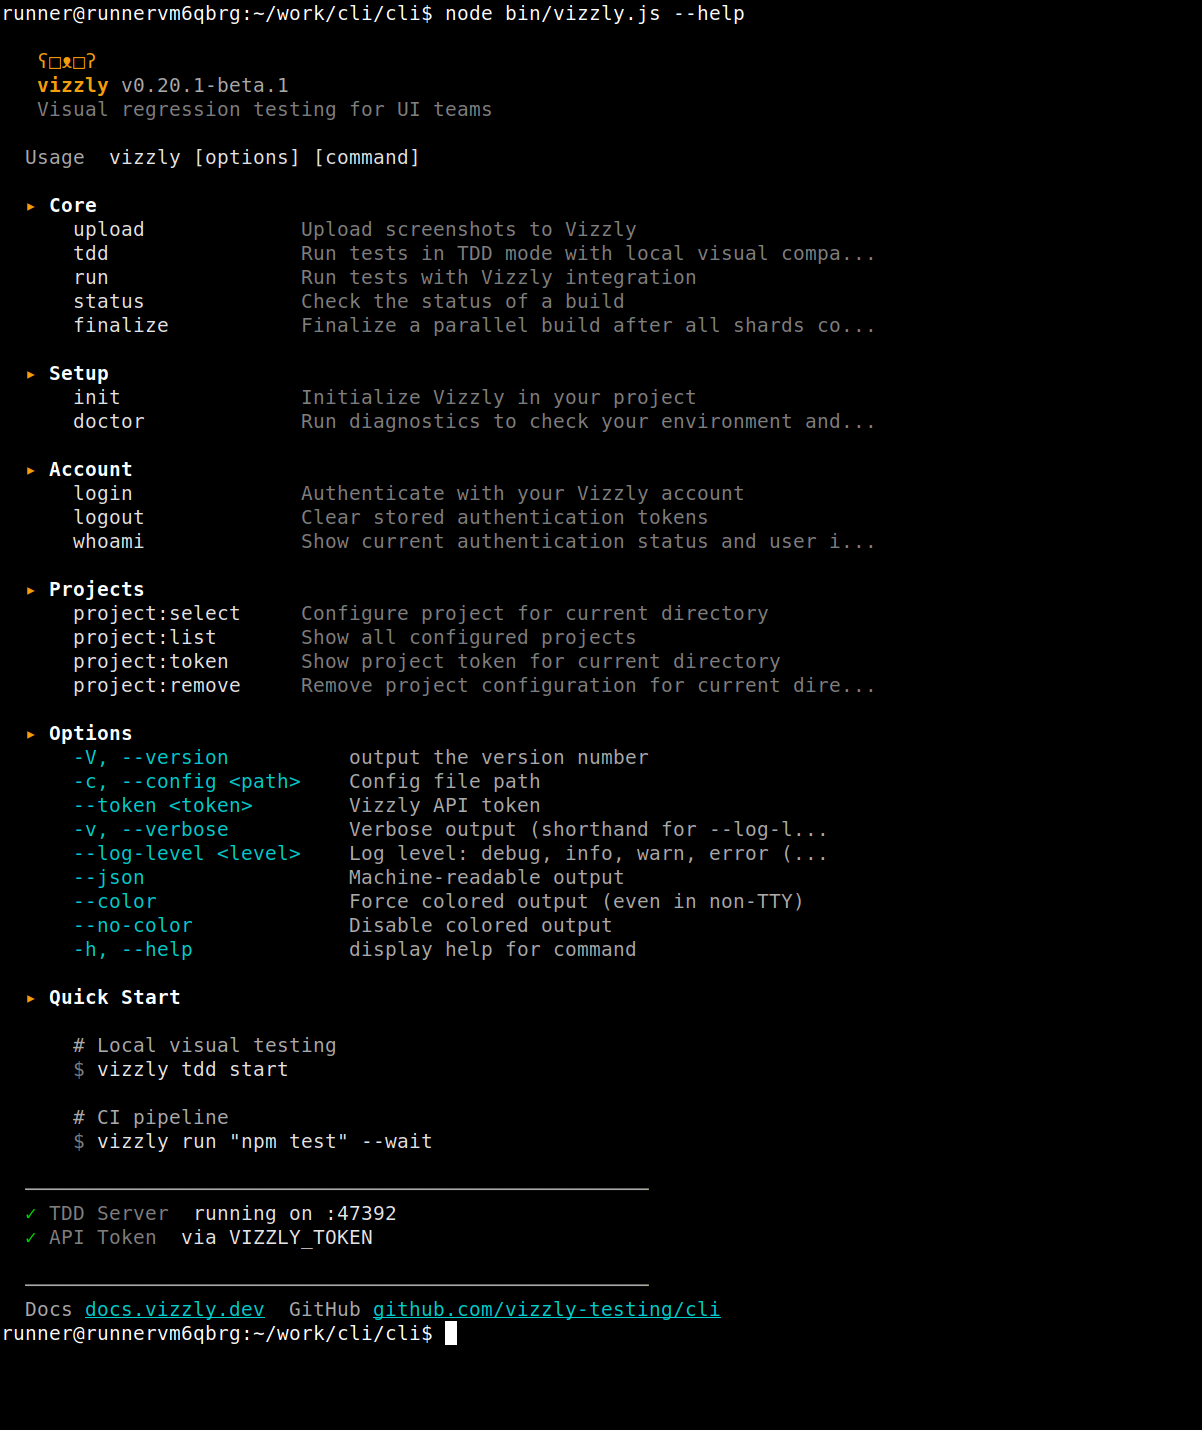
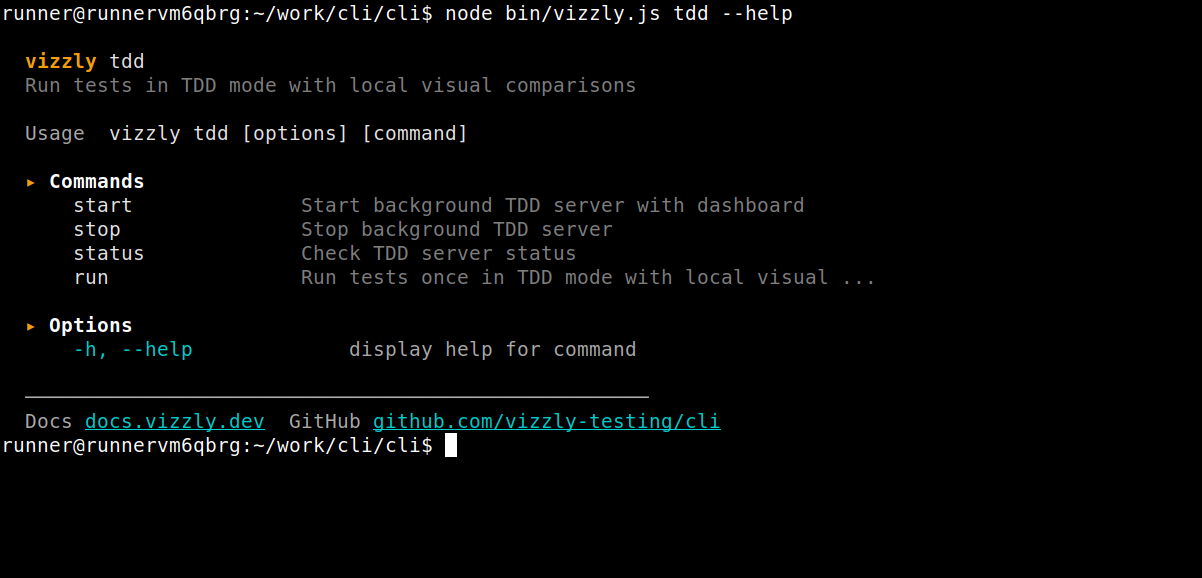
If any of that formatting breaks (a color changes, spacing gets off, a section disappears) we catch it in visual testing. You can actually see our CLI screenshots in the public Vizzly project where we track every build.
The Dogfooding Is Real
There’s something deeply satisfying about using your own product to test your own product. We build visual testing tools. Our CLI helps people run visual tests. And now that CLI is itself visually tested.
When I add a new command or modify the help formatter, I get visual feedback. When the design system colors change, I see the impact across every screen. When a refactor accidentally breaks output formatting, it shows up as a visual diff. It’s the same workflow we preach for web UIs, now applied to our CLI.
Running It in CI
We use a GitHub Action to set up all the x11 dependencies:
- name: Setup TUI Driver
  uses: vizzly-testing/tui-driver@main

- name: Run TUI Visual Tests
  run: npm run test:tui
The action installs xvfb, xterm, xdotool, and imagemagick. Then tests run with full terminal rendering capabilities. Screenshots flow into Vizzly’s normal comparison workflow: new screenshots get compared against baselines, diffs get flagged, approvals update baselines. The whole visual testing loop, but for CLI output.
Why This Was Worth Building
CLIs are getting more sophisticated. Modern terminal emulators support millions of colors. Tools like ink and blessed let you build rich interactive interfaces. Design systems for terminals are a real thing now.
But the testing story has lagged behind. Unit tests check logic, integration tests check behavior, but visual consistency? That’s been manual review at best. Now we have actual visual regression testing for our CLI, and it catches real issues.
If You Want to Try It
I’ll be honest: tui-driver started as a weekend experiment and I’m not sure where it’ll go from here. It works well enough for our needs, and we’re going to keep using it. But it’s definitely more “scratching my own itch” than “polished production tool.”
That said, if you’re building a CLI with colors, formatting, or any visual polish and want to try visual testing it, the code is on GitHub. The Vizzly CLI repo has real examples in the tests/tui/ directory showing how we test help screens, error states, and diagnostic output.
You can also browse the actual screenshots in our public CLI TUI project on Vizzly to see what it looks like in practice.
Want visual regression testing for your web apps or CLIs? Sign up for Vizzly. The web app part is definitely production ready, and hey, now you know the CLI part works too.